고정 헤더 영역
상세 컨텐츠
본문
728x90

16장
리덕스란 가장 많이 사용하는 리액트 상태 관리 라이브러리로, 컴포넌트의 상태 업데이트 관련 로직을 다른 파일로 분리시킬 수 있어 효율적으로 관리할 수 있습니다. 또한, 똑같은 상태를 공유해야할 때도 여러 컴포넌트 없이 손쉽게 값을 전달하거나 업데이트할 수 있습니다.
다음과 같은 흐름으로 진행합니다.
16.1.1 액션
액션 객체는 다음과 같은 형식으로 이루어져 있습니다. 액션 객체는 type 필드를 꼭 가지고 있어야합니다.
{
type: 'TOGGLE_VALUE'
}
16.1.2 액션 생성 함수
액션 생성 함수(action creator)는 액션 객체를 만들어 주는 함수입니다.
function addTodo(data) {
return {
type: 'ADD_TODO',
data
};
}
// 화살표 함수로도 만들 수 있습니다.
const changeInput = text => ({
type: 'CHANGE_INPUT',
text
});
변화를 일으켜야 할 때마다 액션 객체를 만들어야하기에 번거롭고 정보를 놓칠 우려도 있습니다. 이를 방지하기 위해 함수를 만들어서 관리합니다.
16.1.3 리듀서
리듀서(reducer)는 변화를 일으키는 함수입니다. 액션을 만들어서 발생시키면 리듀서가 현재 상태와 전달받은 액션 객체를 파라미터로 받아옵니다. 현재 상태와 액션 객체 두 값을 참고하여 새로운 상태로 만들어서 반환합니다.
const initialState = {
counter: 1
};
function reducer(state = initialState, action) {
switch (action.type) {
case INCREMENT:
return {
counter: state.counter + 1
};
default:
return state;
}
}
16.1.4 스토어
프로젝트에 리덕스를 적용하기 위해 스토어를 만듭니다. 한 개의 프로젝트는 단 하나의 스토어만 가질 수 있습니다. 스토어 안에는 현재 애플리케이션 상태와 리듀서 등 몇 가지 중요한 내장 함수를 지닙니다.
16.1.5 디스패치
디스패치는 스토어의 내장 함수 중 하나입니다. 디스패치는 '액션을 발생시키는 것' 으로, dispatch(action)과 같은 형태로 액션 객체를 파라미터로 넣어서 호출합니다.
디스패치가 호출되면 스토어는 리듀서 함수를 실행시켜서 새로운 상태를 만들어줍니다.
16.1.6 구독
구독도 스토어의 내장 함수중 하나로, subcribe 함수 안에 리스너 함수를 파라미터로 넣어서 호출해 주면, 리스너 함수가 액션이 디스패치되어 상태가 업데이트 될 때마다 호출됩니다.
const listener = () => {
console.log('상태가 업데이트됨');
}
const unsubscribe = store.subscribe(listener);
unsubscribe(); // 추후 구독을 비활성화할 때 함수를 호출
16.2 리액트 없이 쓰는 리덕스
리덕스는 리액트에 종속되는 라이브러리가 아니고, angular-redux, ember redux 와 같은 UI 라이브러리/프레임워크와 함 사용할 수 있습니다. 바닐라(vanilla) 자바스크립트와 함께 사용할 수 있습니다. 바닐라 스크립트는 라이브러리나 프레임워크 없이 사용하는 순수 자바스크립트 그 자체를 의미합니다.
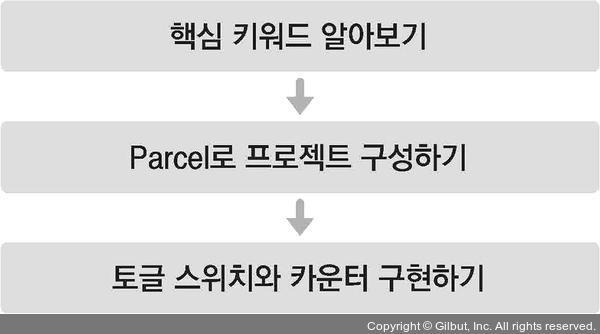
16.2.1 Parcel로 프로젝트 만들기
먼저 parcel-bundler 를 설치해야합니다.
$ yarn global add parcel-bundler
# yarn global이 잘 설치되지 않는다면 npm install -g parcel-bundler를 치면 됩니다.
프로젝트 디렉터리를 생성한 후 package.json 파일을 생성하면 됩니다.
$ mkdir vanilla-redux
$ cd vanilla-redux
# package.json 파일을 생성합니다.
$ yarn init -y
에디터로 해당 디렉터리를 열어서 index.html과 index.js 파일을 만들어야합니다.
index.html
<html>
<body>
<div>바닐라 자바스크립트</div>
<script src="./index.js"></script>
</body>
</html>
index.js
console.log('hello parcel');
다 작성한 후 다음 명령어를 실행하면 개발용 서버가 실행됩니다.
$ parcel index.html
Server running at http://localhost:1234
Built in 548ms.
개발 서버의 주소는 http://localhost:1234/이며, 파일을 저장할 때마다 자동으로 새로고침됩니다.

다음으로 yarn을 사용하여 리덕스 모듈을 설치합니다.
$yan add redux
16.2.2 간단한 UI 구성하기
index.css
.toggle {
border: 2px solid black;
width: 64px;
height: 64px;
border-radius: 32px;
box-sizing: border-box;
}
.toggle.active {
background: yellow;
}
다음으로 index.html을 수정하면 됩니다.
index.html
<html>
<head>
<link rel="stylesheet" type="text/css" href="index.css" />
</head>
<body>
<div class="toggle"></div>
<hr />
<h1>0</h1>
<button id="increase">+1</button>
<button id="decrease">-1</button>
<script src="./index.js"></script>
</body>
</html>

16.2.3 DOM 레퍼런스 만들기
이번 프로젝트에서는 별도의 라이브러리를 사용하지 않기 때문에 DOM을 직접 수정해야합니다. 다음과 같이 코드를 수정해야합니다.
index.js
const divToggle = document.querySelector('.toggle');
const counter = document.querySelector('h1');
const btnIncrease = document.querySelector('#increase');
const btnDecrease = document.querySelector('#decrease');
16.2.4 액션 타입과 액션 생성 함수 정의
프로젝트의 상태에 변화를 일으키는 것을 액션이라고 합니다. 액션 이름은 문자열 형태로, 주로 대문자로 작성하며 액션 이름은 고유해야합니다.
index.js
const divToggle = document.querySelector('.toggle');
const counter = document.querySelector('h1');
const btnIncrease = document.querySelector('#increase');
const btnDecrease = document.querySelector('#decrease');
const TOGGLE_SWITCH = 'TOGGLE_SWITCH';
const INCREASE = 'INCREASE';
const DECREASE = 'DECREASE';
액션 이름을 사용하여 액션 객체를 만드는 액션 생성 함수를 작성해 줍니다. type 값을 반드시 갖고 있어야 합니다.
index.js
const divToggle = document.querySelector('.toggle');
const counter = document.querySelector('h1');
const btnIncrease = document.querySelector('#id');
const btnDecrease = document.querySelector('#decrease');
const TOGGLE_SWITCH = 'TOGGLE_SWITCH';
const INCREASE = 'INCREASE';
const DECREASE = 'DECREASE';
const toggleSwitch = () => ({ type: TOGGLE_SWITCH });
const increase = difference => ({ type: INCREASE, difference });
const decrease = () => ({ type: DECREASE });
16.2.5 초깃값 설정
초깃값을 정의해야합니다. 초깃값의 형태는 숫자, 문자열, 객체 등 자유입니다.
index.js
const divToggle = document.querySelector('.toggle');
const counter = document.querySelector('h1');
const btnIncrease = document.querySelector('#increase');
const btnDecrease = document.querySelector('#decrease');
const TOGGLE_SWITCH = 'TOGGLE_SWITCH';
const INCREASE = 'INCREASE';
const DECREASE = 'DECREASE';
const toggleSwitch = () => ({ type: TOGGLE_SWITCH });
const increase = difference => ({ type: INCREASE, difference });
const decrease = () => ({ type: DECREASE });
const initialState = {
toggle: false,
counter: 0
};
16.2.6 리듀서 함수 정의
리듀서는 변화를 일으키는 함수입니다. 함수의 파라미터로는 state와 action 값을 받아옵니다.
index.js
const divToggle = document.querySelector('.toggle');
const counter = document.querySelector('h1');
const btnIncrease = document.querySelector('#id');
const btnDecrease = document.querySelector('#decrease');
const TOGGLE_SWITCH = 'TOGGLE_SWITCH';
const INCREASE = 'INCREASE';
const DECREASE = 'DECREASE';
const toggleSwitch = () => ({ type: TOGGLE_SWITCH });
const increase = difference => ({ type: INCREASE, difference });
const decrease = () => ({ type: DECREASE });
const initialState = {
toggle: false,
counter: 0
};
// state가 undefined일 때는 initialState를 기본값으로 사용
function reducer(state = initialState, action) {
// action.type에 따라 다른 작업을 처리함
switch (action.type) {
case TOGGLE_SWITCH:
return {
...state, // 불변성 유지를 해 주어야 합니다.
toggle: !state.toggle
};
case INCREASE:
return {
...state,
counter: state.counter + action.difference
};
case DECREASE:
return {
...state,
counter: state.counter - 1
};
default:
return state;
}
}
리듀서 함수가 맨 처음 호출될 때는 state 값이 undefined이므로, 해당값이 undefined로 주어졌을 때는 initialState를 기본값으로 설정하기 위해 함수의 파라미터 쪽에 기본값이 설정되어있습니다. 리듀서에서는 상태의 불변성을 유지하면서 데이터 변화를 주어야하므로 spread 연산자(...)를 사용하면 편합니다. 단, 객체의 구조가 복잡해지면 spread 연산자로 불변성을 관리하며 업데이트하는 것이 굉장히 번거로울 수 있습니다. 복잡해질 경우, immer 라이브러리를 사용하면 좀 더 쉽게 리듀서를 작성할 수 있습니다.
16.2.7 스토어 만들기
스토어를 만들 때는 createStore 함수를 사용합니다. 코드 상단에 import 구문을 넣어 리덕스에서 해당 함수를 불러와야 하고, 함수의 파라미터에는 리듀서 함수를 넣어 주어야합니다.
index.js
import { createStore } from 'redux';
(...)
const store = createStore(reducer);
16.2.8 render 함수 만들기
render 함수는 업데이트될 때마다 호출되며, 리액트의 render와는 다르게 이미 html을 사용하여 만들어진 UI의 속성을 상태에 따라 변경해줍니다.
index.js
(...)
const store = createStore(reducer);
const render = () => {
const state = store.getState(); // 현재 상태를 불러옵니다.
// 토글 처리
if (state.toggle) {
divToggle.classList.add('active');
} else {
divToggle.classList.remove('active');
}
// 카운터 처리
counter.innerText = state.counter;
};
render();
16.2.9 구독하기
스토어의 내장 함수 subcribe를 사용하여 수행할 수 있습니다. subscrive 함수의 파라미터로는 함수 형태의 값을 전달해줍니다.
업데이트될 때마다 호출됩니다.
ex)
const listener = () => {
console.log('상태가 업데이트됨');
}
const unsubscribe = store.subscribe(listener);
unsubscribe(); // 추후 구독을 비활성화할 때 함수를 호출
아래와 같이 코드를 다시 수정합니다.
index.js
(...)
const render = () => {
const state = store.getState(); // 현재 상태를 불러옵니다.
// 토글 처리
if (state.toggle) {
divToggle.classList.add('active');
} else {
divToggle.classList.remove('active');
}
// 카운터 처리
counter.innerText = state.counter;
};
render();
store.subscribe(render);
16.2.10 액션 발생시키기
액션을 발생시키는 것을 디스패치라고 합니다. 디스패치를 할 때는 스토어의 내장 함수 dispatch 사용합니다. 파라미터는 액션 객체를 넣어 주면 됩니다. 다음과 같이 각 DOM 요소에 클릭 이벤트를 설정하면 됩니다.
index.js
(...)
divToggle.onclick = () => {
store.dispatch(toggleSwitch());
};
btnIncrease.onclick = () => {
store.dispatch(increase(1));
};
btnDecrease.onclick = () => {
store.dispatch(decrease());
};
아래와 같은 모습이 나타나면 됩니다.

16.3 리덕스의 세 가지 규칙
16.3.1 단일 스토어
상태 관리가 복잡해지므로 하나의 애플리케이션 안에는 하나의 스토어를 넣어야합니다.
16.3.2 읽기 전용 상태
리덕스는 상태를 업데이트할 때 기존의 객체는 건드리지 않고 새로운 객체를 생성해 주어야 합니다. (불변성 유지)
16.3.3 리듀서는 순수한 함수
변화를 일으키는 리듀서 함수는 순수한 함수여야 합니다. 순수한 함수는 다음 조건을 만족합니다.
• 리듀서 함수는 이전 상태와 액션 객체를 파라미터로 받습니다.
• 파라미터 외의 값에는 의존하면 안 됩니다.
• 이전 상태는 절대로 건드리지 않고, 변화를 준 새로운 상태 객체를 만들어서 반환합니다.
• 똑같은 파라미터로 호출된 리듀서 함수는 언제나 똑같은 결과 값을 반환해야 합니다.
17장 리덕스를 사용하여 리액트 애플리케이션 상태 관리하기
리덕스를 사용하면, 상태 업데이트에 관한 로직을 모듈로 따로 분리하여 컴포넌트 파일과 별개로 관리할 수 있으므로 코드를 유지 보수하는 데 도움이 됩니다.
애플리케이션에서 리덕스를 사용할 때는 react-redux라는 라이브러리에서 제공하는 유틸 함수와 컴포넌트를 사용하여 작업을 처리합니다.

17.1 작업 환경 설정
create-react-app을 사용하여 새로운 리액트 프로젝트를 생성하면 됩니다.
$ yarn create react-app react-redux-tutorial
생성한 프로젝트 디렉터리에 yarn 명령어를 사용하여 리덕스와 react-red ux 라이브러리를 설치합니다.
$ cd react-redux-tutorial
$ yarn add redux react-redux
Prettier를 적용하고 싶다면 디렉터리에 다음과 같이 .prettierrc 파일을 작성하면 됩니다.
.Prettierrc
{
"singleQuote": true,
"semi": true,
"useTabs": false,
"tabWidth": 2,
"trailingComma": "all",
"printWidth": 80
}
17.2 UI 준비하기
프레젠테이셔널 컴포넌트와 컨테이너 컴포넌트를 분리하는 패턴을 리덕스에서 가장 많이 사용합니다.여기서 프레젠테이셔널 컴포넌트란 주로 상태 관리가 이루어지지 않고, 그저 props를 받아와서 화면에 UI를 보여 주기만 하는 컴포넌트를 말합니다. 이와 다르게 컨테이너 컴포넌튼은 리덕스와 연동되어 있는 컴포넌트입니다.

17.2.1 카운터 컴포넌트 만들기
components 디렉터리를 생서한 뒤, 그 안에 Counter 컴포넌트를 작성하면 됩니다.
components/Counter.js
import React from 'react';
const Counter = ({ number, onIncrease, onDecrease }) => {
return (
<div>
<h1>{number}</h1>
<div>
<button onClick={onIncrease}>+1</button>
<button onClick={onDecrease}>-1</button>
</div>
</div>
);
};
export default Counter;
이제 이 컴포넌트를 App 컴포넌트에서 렌더링합니다.
App.js
import React from 'react';
import Counter from './components/Counter';
const App = () => {
return (
<div>
<Counter number={0} />
</div>
);
};
export default App;
yarn start 명령어를 입력해서 개발 서버를 실행하면 아래와 같이 카운터 컴포넌트가 나타나게 됩니다.

17.2.2 할 일 목록 컴포넌트 만들기
components 디렉터리에 Todos 컴포넌트를 아래와 같이 작성하면 됩니다.
components/Todos.js
import React from 'react';
const TodoItem = ({ todo, onToggle, onRemove }) => {
return (
<div>
<input type="checkbox" />
<span>예제 텍스트</span>
<button>삭제</button>
</div>
);
};
const Todos = ({
input, // 인풋에 입력되는 텍스트
todos, // 할 일 목록이 들어 있는 객체
onChangeInput,
onInsert,
onToggle,
onRemove,
}) => {
const onSubmit = e => {
e.preventDefault();
};
return (
<div>
<form onSubmit={onSubmit}>
<input />
<button type="submit">등록</button>
</form>
<div>
<TodoItem />
<TodoItem />
<TodoItem />
<TodoItem />
<TodoItem />
</div>
</div>
);
};
export default Todos;
파일 하나에 두 컴포넌트를 선언했습니다. 컴포넌트를 다 만들었다면 App 컴포넌트에서 카운터 아래에 렌더링해 주세요. hr 태그를 사용하여 사이에 구분선을 그려주겠습니다.
App.js
import React from 'react';
import Counter from './components/Counter';
import Todos from './components/Todos';
const App = () => {
return (
<div>
<Counter number={0} />
<hr />
<Todos />
</div>
);
};
export default App;

17.3 리덕스 관련 코드 작성하기
리덕스를 사용할 때는 액션 타입, 액션 생성 함수, 리듀서 코드를 작성해야 합니다. 이 코드들을 각각 다른 파일에 작성하는 방법도 있고, 기능별로 묶어서 파일 하나에 작성하는 방법도 있습니다.

위 그림은 가장 일반적인 구조로 actions, constants, reducers 라는 세 개의 디렉터리를 만들고 그 안에 기능별로 파일을 하나씩 만드는 방식입니다. 편리하지만, 새로운 액션을 만들 때마다 세 종류의 파일을 모두 수정해야 하기 때문에 불편하기도 합니다.
위 Ducks 패턴은 액션 타입, 액션 생성 함수, 리듀서 함수를 기능별로 파일 하나에 몰아서 다 작성하는 방식입니다. 리덕스를 사용하다가 불편함을 느낀 개발자들이 자주 사용합니다.
17.3.1 counter 모듈 작성하기
Ducks 패턴을 사용하여 액션 타입, 액션 생성 함수, 리듀서를 작성한 코드를 '모듈'이라고 합니다.
17.3.1.1 액션 타입 정의하기
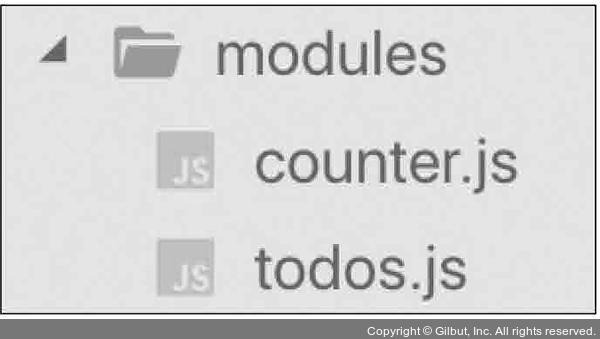
modules 디렉터리를 생성하고 그 안에 counter.js 파일을 아래와 같이 작성합니다.
modules/counter.js
const INCREASE = 'counter/INCREASE';
const DECREASE = 'counter/DECREASE';
가장 먼저 액션 타입을 정의해야합니다. 액션 타입은 대문자로 정의하고, 문자열 내용은 '모듈 이름/액션 이름'과 같은 형태로 작성합니다. 모듈 이름을 붙여 주면 액션 이름이 겹치는 것을 걱정하지 않아도 됩니다.
17.3.1.2 액션 생성 함수 만들기
타입을 정의한 후 액션 생성 함수를 만들어 주어야 합니다.
modules/counter.js
const INCREASE = 'counter/INCREASE';
const DECREASE = 'counter/DECREASE';
export const increase = () => ({ type: INCREASE });
export const decrease = () => ({ type: DECREASE });
앞부분에 export 라는 키워드가 들어가 다른 파일에서 불러와 사용할 수 있습니다.
17.3.1.3 초기 상태 및 리듀서 함수 만들기
counter 모듈의 초기 상태와 리듀서 함수를 만들어 줍시다.
modules/counter.js
const INCREASE = 'counter/INCREASE';
const DECREASE = 'counter/DECREASE';
export const increase = () => ({ type: INCREASE });
export const decrease = () => ({ type: DECREASE });
const initialState = {
number: 0
};
function counter(state = initialState, action) {
switch (action.type) {
case INCREASE:
return {
number: state.number + 1
};
case DECREASE:
return {
number: state.number - 1
};
default:
return state;
}
}
export default counter;
이 모듈의 초기 상태에는 number 값을 설정하고, 리듀서 함수에는 새로운 객체를 생성해서 반환하는 코드를 작성해 주었습니다. 마지막으로 export default 키워드를 사용하여 함수를 내보내주었습니다. export는 여러 개를 내보낼 수 있지만 export default는 단 한개만 내보낼 수 있습니다.
불러오는 방식도 아래와 같이 다릅니다.
import counter from './counter';
import { increase, decrease } from './counter';
// 한꺼번에 불러오고 싶을 때
import counter, { increase, decrease } from './counter';
17.3.2 todos 모듈 만들기
modules 디렉터리에 todo.js 파일을 생성하세요.
17.3.2.1 액션 타입 정의하기\
가장 먼저 해야할 일은 액션 타입 정의입니다.
modules/todo.js
const CHANGE_INPUT = 'todos/CHANGE_INPUT'; // 인풋 값을 변경함
const INSERT = 'todos/INSERT'; // 새로운 todo를 등록함
const TOGGLE = 'todos/TOGGLE'; // todo를 체크/체크 해제함
const REMOVE = 'todos/REMOVE'; // todo를 제거함
17.3.2.2 액션 생성 함수 만들기
액션 생성 함수를 만듭니다. 액션 생성 함수에서 파라미터가 필요합니다. 전달받은 파라미터는 액션 객체 안에 추가 필드로 들어가게 됩니다.
modules/todo.js
const CHANGE_INPUT = 'todos/CHANGE_INPUT'; // 인풋 값을 변경함
const INSERT = 'todos/INSERT'; // 새로운 todo를 등록함
const TOGGLE = 'todos/TOGGLE'; // todo를 체크/체크 해제함
const REMOVE = 'todos/REMOVE'; // todo를 제거함
export const changeInput = input => ({
type: CHANGE_INPUT,
input
});
let id = 3; // insert가 호출될 때마다 1씩 더해집니다.
export const insert = text => ({
type: INSERT,
todo: {
id: id++,
text,
done: false
}
});
export const toggle = id => ({
type: TOGGLE,
id
});
export const remove = id => ({
type: REMOVE,
id
});
위 액션 함수 중에서 insert 함수는 액션 객체를 만들 때 파라미터 외에 사전에 이미 선언되어 있는 id라는 값에도 의존합니다. 이 액션 생성 함수는 호출될 때마다 id 값에 1씩 더해 줍니다. 이 id 값은 각 todo 객체가 들고 있게 될 고윳값입니다.
17.3.2.3 초기 상태 및 리듀서 함수 만들기
불변성을 유지하면서 spread 연산자(...)를 잘 활용하여 작성하고, 배열에 변화를 줄 때는 배열 내장 함수를 사용하여 구현하면 됩니다.
modules/todos.js
(...)
const initialState = {
input: '',
todos: [
{
id: 1,
text: '리덕스 기초 배우기',
done: true
},
{
id: 2,
text: '리액트와 리덕스 사용하기',
done: false
}
]
};
function todos(state = initialState, action) {
switch (action.type) {
case CHANGE_INPUT:
return {
...state,
input: action.input
};
case INSERT:
return {
...state,
todos: state.todos.concat(action.todo)
};
case TOGGLE:
return {
...state,
todos: state.todos.map(todo =>
todo.id = = = action.id ? { ...todo, done: !todo.done } : todo
)
};
case REMOVE:
return {
...state,
todos: state.todos.filter(todo => todo.id != = action.id)
};
default:
return state;
}
}
export default todos;
17.3.3 루트 리듀서 만들기
기존에 만들었던 리듀서를 하나로 합치기 위해 combineReducers라는 유틸 함수를 사용하여 쉽게 처리합니다.
modules 디렉터리에 index.js 파일을 만들고, 그 안에 다음과 같은 코드를 작성합니다.
modules/index.js
import { combineReducers } from 'redux';
import counter from './counter';
import todos from './todos';
const rootReducer = combineReducers({
counter,
todos,
});
export default rootReducer;
17.4.1 스토어 만들기
가장 먼저 스토어를 생성합니다.
src/index.js
import React from 'react';
import ReactDOM from 'react-dom';
import { createStore } from 'redux';
import './index.css';
import App from './App';
import * as serviceWorker from './serviceWorker';
import rootReducer from './modules';
const store = createStore(rootReducer);
ReactDOM.render(<App />, document.getElementById('root'));
serviceWorker.unregister();
17.4.2 Provider 컴포넌트를 사용하여 프로젝트에 리덕스 적용하기
리액트 컴포넌트에서 스토어를 사용할 수 있도록 App 컴포넌트를 react-redux에서 제공하는 Provider 컴포넌트로 감싸 줍니다. 이 컴포넌트를 사용할 때는 store를 props로 전달해주어야 합니다.
src/index.js
import React from 'react';
import ReactDOM from 'react-dom';
import { createStore } from 'redux';
import { Provider } from 'react-redux';
import './index.css';
import App from './App';
import * as serviceWorker from './serviceWorker';
import rootReducer from './modules';
const store = createStore(rootReducer);
ReactDOM.render(
<Provider store={store}>
<App />
</Provider>,
document.getElementById('root'),
);
serviceWorker.unregister();
17.4.3 Redux DevTools의 설치 및 적용
크롬에서 Redux DevTools를 설치 한 후 다음과 같이 적용할 수 있습니다.
const store = createStore(
rootReducer, /* preloadedState, */
window._ _REDUX_DEVTOOLS_EXTENSION_ _ && window._ _REDUX_DEVTOOLS_EXTENSION_ _()
);
redux-devtools-extension을 yarn을 사용하여 설치합니다.
$ yarn add redux-devtools-extension
다음과 같이 적용해 주면 됩니다.
src/index.js
import React from 'react';
import ReactDOM from 'react-dom';
import { createStore } from 'redux';
import { Provider } from 'react-redux';
import { composeWithDevTools } from 'redux-devtools-extension';
import './index.css';
import App from './App';
import * as serviceWorker from './serviceWorker';
import rootReducer from './modules';
const store = createStore(rootReducer, composeWithDevTools());
ReactDOM.render(
<Provider store={store}>
<App />
</Provider>,
document.getElementById('root'),
);
serviceWorker.unregister();
크롬 개발자 도구를 실행한 후 Redux 탭을 엽니다. 아래 사진에서 State 버튼을 눌러 내부 상태가 잘 보이는지 확인합니다.

17.5 컨테이너 컴포넌트 만들기
리덕스 스토어와 연동된 컴포넌트를 컨테이너 컴포넌트라고 부릅니다.
17.5.1 CounterContainer 만들기
src 디렉터리에 containers 디렉터리를 생성하고, 그 안에 CounterContainer 컴포넌트를 만듭니다.
containers/CounterContainers.js
import React from 'react';
import Counter from '../components/Counter';
const CounterContainer = () => {
return <Counter />;
};
export default CounterContainer;
위 컴포넌트를 리덕스와 연동하려면 connect 함수를 사용해야합니다.
connect(mapStateToProps, mapDispatchToprops)(연동할 컴포넌트)
mapStateToProps는 리덕스 스토어 안의 상태를 컴포넌트의 props로 넘겨주기 위해 설정하는 함수, mapDispatchToProps는 액션 생성 함수를 컴포넌트의 props로 넘겨주기 위해 사용하는 함수입니다.
위 코드를 더 쉽게 풀면 다음과 같은 형태입니다.
const makeContainer = connect(mapStateToProps, mapDispatchToProps)
makeContainer(타깃 컴포넌트)
이제 CounterContainer 컴포넌트에서 connect를 사용하도록 하겠습니다.
containers/CounterContainer.js
import React from 'react';
import { connect } from 'react-redux';
import Counter from '../components/Counter';
const CounterContainer = ({ number, increase, decrease }) => {
return (
<Counter number={number} onIncrease={increase} onDecrease={decrease} />
);
};
const mapStateToProps = state => ({
number: state.counter.number,
});
const mapDispatchToProps = dispatch => ({
// 임시 함수
increase: () => {
console.log('increase');
},
decrease: () => {
console.log('decrease');
},
});
export default connect(
mapStateToProps,
mapDispatchToProps,
)(CounterContainer);
mapStateToProps와 mapDispatchProps에서 반환하는 객체 내부의 값들은 컴포넌트의 props로 전달됩니다. mapStateToProps는 state를 파라미터로 받아 오며, 이 값은 현재 스토어가 지니고 있는 상태를 가리킵니다. mapDispatchToProps의 경우 store의 내장 함수 dispatch를 파라미터로 받아 옵니다. 현재 mapDispatchToProps에서는 진행 절차를 설명하기 위해 임시로 console.log를 사용하고 있습니다.
App에서 Counter를 CounterContainer로 교체하세요.
App.js
import React from 'react';
import Todos from './components/Todos';
import CounterContainer from './containers/CounterContainer';
const App = () => {
return (
<div>
<CounterContainer />
<hr />
<Todos />
</div>
);
};
export default App;
브라우저를 열어 +1,-1 버튼을 눌러 콘솔에 increase,decrease 가 찍히는지 확인합니다.
console.log 대신 액션 생성 함수를 불러와서 액션 객체를 만들고 디스패치해주겠습니다.
containers/CounterContainer.js
import React from 'react';
import { connect } from 'react-redux';
import Counter from '../components/Counter';
import { increase, decrease } from '../modules/counter';
const CounterContainer = ({ number, increase, decrease }) => {
return (
<Counter number={number} onIncrease={increase} onDecrease={decrease} />
);
};
const mapStateToProps = state => ({
number: state.counter.number,
});
const mapDispatchToProps = dispatch => ({
increase: () => {
dispatch(increase());
},
decrease: () => {
dispatch(decrease());
},
});
export default connect(
mapStateToProps,
mapDispatchToProps,
)(CounterContainer);
+1,-1 버튼을 다시 눌러 숫자가 바뀌는 지 확인합니다.
connect 함수를 사용할 때는 위 코드와 같이 mapStateToProps와 mapDispatchToProps를 미리 선언해 놓고 사용합니다.
containers/CounterContainer.js
import React from 'react';
import { connect } from 'react-redux';
import Counter from '../components/Counter';
import { increase, decrease } from '../modules/counter';
const CounterContainer = ({ number, increase, decrease }) => {
return (
<Counter number={number} onIncrease={increase} onDecrease={decrease} />
);
};
export default connect(
state => ({
number: state.counter.number,
}),
dispatch => ({
increase: () => dispatch(increase()),
decrease: () => dispatch(decrease()),
}),
)(CounterContainer);
위 코드에서는 불필요한 코드 블록을 생략해 주었습니다.
increase: () => dispatch(increase()),
increase: () => { return dispatch(increase()) },
액션 생성 함수의 개수가 많아진다면 bindActionCreators 유틸 함수를 사용합니다.
containers/CounterContainers.js
import React from 'react';
import { bindActionCreators } from 'redux';
import { connect } from 'react-redux';
import Counter from '../components/Counter';
import { increase, decrease } from '../modules/counter';
const CounterContainer = ({ number, increase, decrease }) => {
return (
<Counter number={number} onIncrease={increase} onDecrease={decrease} />
);
};
export default connect(
state => ({
number: state.counter.number,
}),
dispatch =>
bindActionCreators(
{
increase,
decrease,
},
dispatch,
),
)(CounterContainer);
더 쉬운 방법은 mapDispatchToProps에 해당하는 파라미터를 함수 형태가 아닌 액션 생성 함수로 이루어진 객체 형태로 넣어 주는 것입니다.
containers/CounterContainer.js
import React from 'react';
import { connect } from 'react-redux';
import Counter from '../components/Counter';
import { increase, decrease } from '../modules/counter';
const CounterContainer = ({ number, increase, decrease }) => {
return (
<Counter number={number} onIncrease={increase} onDecrease={decrease} />
);
};
export default connect(
state => ({
number: state.counter.number,
}),
{
increase,
decrease,
},
)(CounterContainer);
17.5.2 TodosContainer 만들기
connect 함수를 사용하고, mapDispatchToProps를 짧고 간단하게 쓰는 방법을 적용합니다.
containers/TodosContainer.js
import React from 'react';
import { connect } from 'react-redux';
import { changeInput, insert, toggle, remove } from '../modules/todos';
import Todos from '../components/Todos';
const TodosContainer = ({
input,
todos,
changeInput,
insert,
toggle,
remove,
}) => {
return (
<Todos
input={input}
todos={todos}
onChangeInput={changeInput}
onInsert={insert}
onToggle={toggle}
onRemove={remove}
/>
);
};
export default connect(
// 비구조화 할당을 통해 todos를 분리하여
// state.todos.input 대신 todos.input을 사용
({ todos }) => ({
input: todos.input,
todos: todos.todos,
}),
{
changeInput,
insert,
toggle,
remove,
},
)(TodosContainer);
컨테이너 컴포넌트를 만든 후에 App 컴포넌트에서 보여주던 Todos 컴포넌트를 TodosContainer 컴포넌트로 교체합니다.
App.js
import React from 'react';
import CounterContainer from './containers/CounterContainer';
import TodosContainer from './containers/TodosContainer';
const App = () => {
return (
<div>
<CounterContainer />
<hr />
<TodosContainer />
</div>
);
};
export default App;
components/Todos.js
import React from 'react';
const TodoItem = ({ todo, onToggle, onRemove }) => {
return (
<div>
<input
type="checkbox"
onClick={() => onToggle(todo.id)}
checked={todo.done}
readOnly={true}
/>
<span style={{ textDecoration: todo.done ? 'line-through' : 'none' }}>
{todo.text}
</span>
<button onClick={() => onRemove(todo.id)}>삭제</button>
</div>
);
};
const Todos = ({
input, // 인풋에 입력되는 텍스트
todos, // 할 일 목록이 들어 있는 객체
onChangeInput,
onInsert,
onToggle,
onRemove,
}) => {
const onSubmit = e => {
e.preventDefault();
onInsert(input);
onChangeInput(''); // 등록 후 인풋 초기화
};
const onChange = e => onChangeInput(e.target.value);
return (
<div>
<form onSubmit={onSubmit}>
<input value={input} onChange={onChange} />
<button type="submit">등록</button>
</form>
<div>
{todos.map(todo => (
<TodoItem
todo={todo}
key={todo.id}
onToggle={onToggle}
onRemove={onRemove}
/>
))}
</div>
</div>
);
};
export default Todos;
모든 작업이 끝났습니다.

17.6 리덕스 더 편하게 사용하기
redux-actions라는 라이브러리와 이전에 배웠던 immer 라이브러리를 활용하면 리덕스를 훨씬 편하게 사용할 수 있습니다.
17.6.1 redux-actions
redux-actions를 사용하면 액션 생성 함수를 더 짧은 코드로 작성할 수 있습니다.
우선 설치합니다.
$ yarn add redux-actions
17.6.1.1 conter 모듈에 적용하기
counter 모듈에 작성된 액션 생성 함수를 createAction이란 함수를 사용하여 만듭니다.
modules/counter.js
import { createAction } from 'redux-actions';
const INCREASE = 'counter/INCREASE';
const DECREASE = 'counter/DECREASE';
export const increase = createAction(INCREASE);
export const decrease = createAction(DECREASE);
(...)
handleActions라는 함수를 사용합니다.
modules/counter.js
import { createAction, handleActions } from 'redux-actions';
const INCREASE = 'counter/INCREASE';
const DECREASE = 'counter/DECREASE';
export const increase = createAction(INCREASE);
export const decrease = createAction(DECREASE);
const initialState = {
number: 0,
};
const counter = handleActions(
{
[INCREASE]: (state, action) => ({ number: state.number + 1 }),
[DECREASE]: (state, action) => ({ number: state.number - 1 }),
},
initialState,
);
export default counter;
17.6.1.2 todos 모듈에 적용하기
똑같은 작업을 todos 모듈에도 적용할 수 있습니다.
createAction으로 액션을 만들면 액션에 필요한 추가 데이터는 payload라는 이름을 사용합니다. 예를 들면 다음과 같습니다.
const MY_ACTION = 'sample/MY_ACTION';
const myAction = createAction(MY_ACTION);
const action = myAction('hello world');
/*
결과:
{ type: MY_ACTION, payload: 'hello world' }
*/
액션 생성 함수에서 받아 온 파라미터를 그대로 payload에 넣는 것이 아니라 변형을 주어서 넣고 싶다면, createAction의 두 번째 함수에 payload를 정의하는 함수를 따로 선언해서 넣어 주면 됩니다.
const MY_ACTION = 'sample/MY_ACTION';
const myAction = createAction(MY_ACTION, text => `${text}!`);
const action = myAction('hello world');
/*
결과:
{ type: MY_ACTION, payload: 'hello world!' }
*/
todos 모듈의 액션 생성 함수를 다음과 같이 새로 작성하도록 하겠습니다.
modules/todos.js
import { createAction } from 'redux-actions';
const CHANGE_INPUT = 'todos/CHANGE_INPUT'; // 인풋 값을 변경함
const INSERT = 'todos/INSERT'; // 새로운 todo를 등록함
const TOGGLE = 'todos/TOGGLE'; // todo를 체크/체크 해제함
const REMOVE = 'todos/REMOVE'; // todo를 제거함
export const changeInput = createAction(CHANGE_INPUT, input => input);
let id = 3; // insert가 호출될 때마다 1씩 더해집니다.
export const insert = createAction(INSERT, text => ({
id: id++,
text,
done: false,
}));
export const toggle = createAction(TOGGLE, id => id);
export const remove = createAction(REMOVE, id => id);
(...)
액션 생성 함수를 다 작성했으면 handleActions로 리듀서를 재작성해 보겠습니다.
modules/todos.js
import { createAction, handleActions } from 'redux-actions';
(...)
const todos = handleActions(
{
[CHANGE_INPUT]: (state, action) => ({ ...state, input: action.payload }),
[INSERT]: (state, action) => ({
...state,
todos: state.todos.concat(action.payload),
}),
[TOGGLE]: (state, action) => ({
...state,
todos: state.todos.map(todo =>
todo.id = = = action.payload ? { ...todo, done: !todo.done } : todo,
),
}),
[REMOVE]: (state, action) => ({
...state,
todos: state.todos.filter(todo => todo.id != = action.id),
}),
},
initialState,
);
export default todos;
객체 비구조화 할당 문법으로 action 값의 payload 이름을 새로 설정해 주면action.payload가 정확히 어떤 값을 의미하는지 더 쉽게 파악할 수 있습니다.
modules/todo.js
(...)
const todos = handleActions(
{
[CHANGE_INPUT]: (state, { payload: input }) => ({ ...state, input }),
[INSERT]: (state, { payload: todo }) => ({
...state,
todos: state.todos.concat(todo),
}),
[TOGGLE]: (state, { payload: id }) => ({
...state,
todos: state.todos.map(todo =>
todo.id = = = id ? { ...todo, done: !todo.done } : todo,
),
}),
[REMOVE]: (state, { payload: id }) => ({
...state,
todos: state.todos.filter(todo => todo.id != = id),
}),
},
initialState,
);
export default todos;
17.6.2 immer
모듈의 상태가 복잡해질수록 불변성을 지키기 까다로워집니다. 그럴 경우, immer를 사용하면 훨씬 편리하게 상태를 관리할 수 있습니다. 우선 immer를 현재 프로젝트에 설치합니다.
$yarn add immer
modules/todo.js
import { createAction, handleActions } from 'redux-actions';
import produce from 'immer';
(...)
const todos = handleActions(
{
[CHANGE_INPUT]: (state, { payload: input }) =>
produce(state, draft => {
draft.input = input;
}),
[INSERT]: (state, { payload: todo }) =>
produce(state, draft => {
draft.todos.push(todo);
}),
[TOGGLE]: (state, { payload: id }) =>
produce(state, draft => {
const todo = draft.todos.find(todo => todo.id = = = id);
todo.done = !todo.done;
}),
[REMOVE]: (state, { payload: id }) =>
produce(state, draft => {
const index = draft.todos.findIndex(todo => todo.id = = = id);
draft.todos.splice(index, 1);
}),
},
initialState,
);
export default todos;
17.7 Hooks를 사용하여 컨테이너 컴포넌트 만들기
17.7.1 useSelector로 상태 조회하기
useSelector Hook을 사용하면 connect 함수를 사용하지 않고도 리덕스의 상태를 조회할 수 있습니다. useSelector의 사용법은 다음과 같습니다.
const 결과 = useSelector(상태 선택 함수);
containers/CounterContainer.js
import React from 'react';
import { useSelector } from 'react-redux';
import Counter from '../components/Counter';
import { increase, decrease } from '../modules/counter';
const CounterContainer = () => {
const number = useSelector(state => state.counter.number);
return <Counter number={number} />;
};
export default CounterContainer;
17.7.2 useDispatch를 사용하여 액션 디스패치하기
컨테이너 컴포넌트에서 액션을 디스패치해야 한다면 이 Hook을 사용하면 됩니다. 사용법은 다음과 같습니다.
const dispatch = useDispatch();
dispatch({ type: 'SAMPLE_ACTION' });
containers/CounterContainer.js
import React from 'react';
import { useSelector, useDispatch } from 'react-redux';
import Counter from '../components/Counter';
import { increase, decrease } from '../modules/counter';
const CounterContainer = () => {
const number = useSelector(state => state.counter.number);
const dispatch = useDispatch();
return (
<Counter
number={number}
onIncrease={() => dispatch(increase())}
onDecrease={() => dispatch(decrease())}
/>
);
};
export default CounterContainer;
만약 컴포넌트 성능을 최적화해야 하는 상황이 온다면 useCallback으로 액션을 디스패치하는 함수를 감싸 주는 것이 좋습니다.
containers/CounterContainer.js
import React, { useCallback } from 'react';
import { useSelector, useDispatch } from 'react-redux';
import Counter from '../components/Counter';
import { increase, decrease } from '../modules/counter';
const CounterContainer = () => {
const number = useSelector(state => state.counter.number);
const dispatch = useDispatch();
const onIncrease = useCallback(() => dispatch(increase()), [dispatch]);
const onDecrease = useCallback(() => dispatch(decrease()), [dispatch]);
return (
<Counter number={number} onIncrease={onIncrease} onDecrease={onDecrease} />
);
};
export default CounterContainer;
17.7.3 useStore를 사용하여 리덕스 스토어 사용하기
useStore Hooks를 사용하면 리덕스 스토어 객체를 직접 사용할 수 있습니다.
const store = useStore();
store.dispatch({ type: 'SAMPLE_ACTION '});
store.getState();
17.7.4 TodosContainer를 Hooks로 전환하기
이제 TodosContainer를 connect 함수 대신에 useSelector와 useDispatch Hooks를 사용하는 형태로 전환해 봅시다.
containers/TodosContainer.js
import React, { useCallback } from 'react';
import { useSelector, useDispatch } from 'react-redux';
import { changeInput, insert, toggle, remove } from '../modules/todos';
import Todos from '../components/Todos';
const TodosContainer = () => {
const { input, todos } = useSelector(({ todos }) => ({
input: todos.input,
todos: todos.todos
}));
const dispatch = useDispatch();
const onChangeInput = useCallback(input => dispatch(changeInput(input)), [
dispatch
]);
const onInsert = useCallback(text => dispatch(insert(text)), [dispatch]);
const onToggle = useCallback(id => dispatch(toggle(id)), [dispatch]);
const onRemove = useCallback(id => dispatch(remove(id)), [dispatch]);
return (
<Todos
input={input}
todos={todos}
onChangeInput={onChangeInput}
onInsert={onInsert}
onToggle={onToggle}
onRemove={onRemove}
/>
);
};
export default TodosContainer;
17.7.5 useActions 유틸 Hook을 만들어서 사용하기
useActions는 원래 react-redux에 내장된 상태로 릴리즈될 계획이었으나 리덕스 개발 팀에서 꼭 필요하지 않다고 판단하여 제외된 Hook입니다. 그 대신 공식 문서에서 그대로 복사하여 사용할 수 있도록 제공하고 있습니다.
• 참고 링크: https://react-redux.js.org/next/api/hooks#recipe-useactions
src디렉터리에 lib 디렉터리를 만들고, 그 안에 useActions.js 파일을 다음과 같이 작성해보세요.
lib/useActions.js
import { bindActionCreators } from 'redux';
import { useDispatch } from 'react-redux';
import { useMemo } from 'react';
export default function useActions(actions, deps) {
const dispatch = useDispatch();
return useMemo(
() => {
if (Array.isArray(actions)) {
return actions.map(a => bindActionCreators(a, dispatch));
}
return bindActionCreators(actions, dispatch);
},
deps ? [dispatch, ...deps] : deps
);
}
TodoContainer에서 useActions를 불러와 사용해 봅시다.
containers/TodoContainer.js
import React from 'react';
import { useSelector } from 'react-redux';
import { changeInput, insert, toggle, remove } from '../modules/todos';
import Todos from '../components/Todos';
import useActions from '../lib/useActions';
const TodosContainer = () => {
const { input, todos } = useSelector(({ todos }) => ({
input: todos.input,
todos: todos.todos
}));
const [onChangeInput, onInsert, onToggle, onRemove] = useActions(
[changeInput, insert, toggle, remove],
[]
);
return (
<Todos
input={input}
todos={todos}
onChangeInput={onChangeInput}
onInsert={onInsert}
onToggle={onToggle}
onRemove={onRemove}
/>
);
};
export default TodosContainer;
17.7.6 connect 함수와의 주요 차이점
connect 함수를 사용하여 컨테이너 컴포넌트를 만들었을 경우, 해당 컨테이너 컴포넌트의 부모 컴포넌트가 리렌더링될 때 해당 컨테이너 컴포넌트의 props가 바뀌지 않았다면 리렌더링이 자동으로 방지되어 성능이 최적화됩니다.
반면 useSelector를 사용하여 리덕스 상태를 조회했을 때는 이 최적화 작업이 자동으로 이루어지지 않으므로, 성능 최적화를 위해서는 React.memo를 컨테이너 컴포넌트에 사용해 주어야 합니다.
containers/CounterContainer.js
import React from 'react';
import { useSelector } from 'react-redux';
import { changeInput, insert, toggle, remove } from '../modules/todos';
import Todos from '../components/Todos';
import useActions from '../lib/useActions';
const TodosContainer = () => {
(...)
};
export default React.memo(TodosContainer);
교재 [리액트를 다루는 기술]
Corner React.js
Editor: 채옹
728x90
'25-26 > React.js' 카테고리의 다른 글
| [React.js] project 3 [감정 일기장] 만들기 (0) | 2026.01.09 |
|---|---|
| [React.js] 9장.컴포넌트 트리에 데이터 공급하기 (0) | 2026.01.02 |
| [React.js] project 2[할일 관리] 앱 만들기 (Read: 할 일 리스트 렌더링하기 ~ Delete: 할 일 삭제하기) (0) | 2025.12.26 |
| [React.js] project 2[할일 관리] 앱 만들기 (프로젝트 준비하기 ~ Create: 할 일 추가하기) (0) | 2025.12.19 |
| [React.js] UseReducer와 상태 관리 -최적화 (0) | 2025.11.28 |